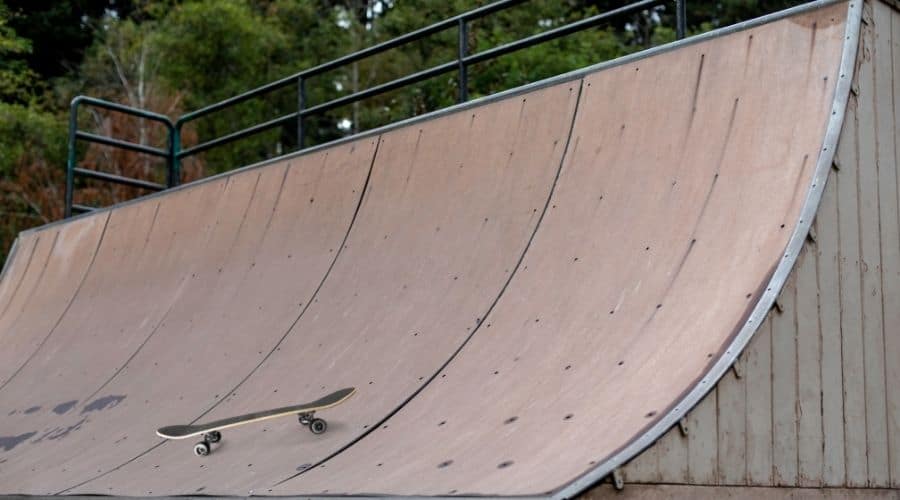
There are over 2800 skate parks in the USA today, but even if you’re lucky you probably don’t live near more than one, so building your own backyard quarter pipe to practice at home is smart.
With suitable materials and directions, you can make an outstanding, sturdy piece of equipment that lasts for years. How do you build a backyard quarter pipe? I’ll show you step-by-step and provide a materials list.
The easiest way to build a backyard quarter pipe for skateboarding is with an integrated deck. Adding a removable deck gives you more possible weak points where your quarter pipe can fail, causing injuries and costly rebuilds. Using a design with one solid cut plywood board for each side, including the transition and deck, is safer and sturdier.
Table of Contents
Materials Needed To Build A Backyard Quarter Pipe
To build a 3′ by 4′ quarter pipe, you only need a couple of tools, a jigsaw, and a screwdriver.
Finishing the top of your ramp with a Masonite board is an excellent way to help stabilize your sharing surface. It also helps minimize fall damage.
For this project, you need 4′ 0 by 4′ 6 and 4′ 0 by 4′ 9 pieces for the transition once you finish most of the build.
You’ll also need plenty of screws, a pencil or marker, and a couple of sawhorses.
If you want to upgrade your quarter pipe for more extended use, you can also use wood glue where the pieces meet.
Below is an easy chart of the lumber and steel that makes up most of your backyard quarter pipe.
Materials to Build a 3′ by 4′ Backyard Quarter Pipe
| Material | Type | Size | Quantity |
| Steel | 2″ OD Schedule 80 Pipe | 4′-0 | 1 |
| Steel | Plate 3/16″ | 1′-6 x 4′-0 | 1 |
| Lumber | 2 x 4 | 8′ | 7 |
| Plywood | 3/8″ | 8′ x 4′ | 2 |
| Plywood | 3/4″ | 8′ x 4′ | 1 |
Pro Tip: I strongly recommend using treated wood whenever possible, especially for a backyard quarter pipe. You will also want a high-quality wood sealant for the exposed surfaces. Taking the time to seal your boards, so they’re waterproof will further extend the working life of your quarter pipe.
How Much Does It Cost To Build A Quarter Pipe
The average cost to build a quarter pipe is $150 to $250. You can spend more on super expensive materials, but it won’t improve the quality of your quarter pipe very much.
Additionally, if you live in an expensive area like Hawaii or NYC, you’ll spend more on the materials because of the cost of living.
Pro Tip: Keep an eye on lumber prices and buy your materials when costs are lower. As Adverticia explains, “All lumber yards are lessening their supply during the summer, while demand is at its peak. Wait a few months, and prices will certainly be lower.” Fall and winter, right after major holidays, are when you’re most likely to get a good deal on a small amount of lumber. However, if you have another large project, you can save by buying in bulk and adding on the pieces you need for your quarter pipe.
How Do You Make A Backyard Quarter Pipe – (Step By Step)
I will walk you through everything you need to know to create your own backyard quarter pipe.
Please bear in mind that this is not a mini-quarter pipe. You will need plenty of room to build and skate.
The materials on the list above don’t leave any room for error. Always double-check your measurements and take your time so it comes out right the first time.
1 – Make Your Supports
Take your 8-foot-long 2 x 4’s and set them up to cut. The goal is to turn each 8-foot length into two 3′-10.5″ long sections.
This should leave you with 26 pieces that each measure the same size.
2 – Mark and Cut Your Deck
For this step, you need the 3/4″ plywood. Please do not substitute for particleboard because it will fall apart much faster, especially if it gets wet.
You are going to make the sides and deck out of this piece.
On one long side, mark out an 11 1/4″ board. Now bisect it, so you have two 4′ x 11 1/4′ boards.
It’s essential to be precise when you cut out these boards because any wobbles in your cut will become an uneven bottom or top to your side pieces.
Once you’ve cut this, please set it to the side for now.
3 – Mark and Cut The Sides
Marking the curved part of the side panels for the transition is a little trickier than the deck.
First, even out the remaining larger piece of your 3/4″ plywood, to exactly 2′-11 1/4″ wide. Your board should still be 8′ long at this point.
Next, measure 1′-10 1/2″ in from the end on one of the long sides. On the opposite diagonal corner, repeat the process, so you have marks on both long sides.
Drop each mark in toward the center 1-1/4″ and then add another line parallel with the long side of the board that is 1-5/8″ leaving you with two L shaped marks.
Starting from the opposite of where you started on the long sides, measure 5′-10 3/4″ in and make the mark that 1-1/4″ long.
You should end up with two sets of two marks on the long sides of your board that are about 2″ apart.
One mark will be a 1-1/4″ line, and the other will be a 1-1/4″ line with a 1-5/8″ line at the end making it into an L.
These lines represent the top and bottom of your two sides. You need to create your transition curve from the end of one L to the end of the opposite side’s straight line and vice versa.
I recommend cutting one first and using it as the template to match the other.
If you’re not sure how to cut layout and cut a curve on plywood, I recommend this video from Home Improvement Woodworking.
Once the sides are marked and cut, you have finished the most challenging part.
4 – Mark and Cut The Transition
The main body of your transition is simple. You need two rectangles. The first should be 4′ 0 x 5′ 6, and the second should be 4′ 0 by 5′ 9.
There’s no fancy cutting here, only straight lines. You’ll be layering these on top of each other to create the ‘floor’ on your transition.
Set These aside once they’re cut, and you can move on to creating the braced structure.
5 – Framing It Out
Attaching the top and bottom 2 x 4’s first will help hold the sides together.
On the bottom of your ramp, place one 2 x 4 piece horizontally on the ground and screw it to the leading edge of the transition where the curve will meet the ground.
Turn another 2 x 4 vertical and screw it to the very back end of the bottom standing up, so it’s 4″ tall.
At the top of the curve, add another 2 x 4 along the curve but before the cut indent. At the back of that indent, use a vertical 2 x 4.
Place two vertical 2 x 4s in the exact center of the top where your deck platform will sit so you have stability and somewhere to attach the top boards.
Finally, add another horizontal 2 x 4 at the back of the top part of your structure. It should stand on its own now.
Working perpendicular to where the transition will go, add another bracer every eight inches down the length of the transition curve.
Be careful to ensure that every 2 x 4 you use to brace is either touching the ground or precisely flush with the edges of the side panels.
6 – Finish The External Assembly
You are almost done. First, attach your pipe. Add the two 4′ 0 boards you cut initially and screw them down at regular intervals.
Next, take the shorter transition board and line it up, carefully getting your screws into the crossbars.
The larger 4′ 0 x 4′ 9 transition board goes on top of the smaller one, and the 4′ 0 x 4′ 6 masonite should be countersunk and line up with the top of the ramp leaving a gap at the bottom for your steel plate.
Make sure the screws are flush on the surface.
Helpful Tips To Know About Building A Backyard Quarter Pipe
You can adjust your backyard quarter pipe up and down for steeper and shallower angles or put two together for a half pipe.
Once you’ve built the first one, you’ll see how easy and fun it is to make backyard skate park equipment at home.
Here are more helpful tips to know about building a backyard quarter pipe.
- Always wear proper safety equipment and clothing you don’t mind getting dirty when engaging in a building project like this. You don’t want splinters and sawdust in your hands, eyes, or lungs, and you will get messy.
- You can paint your quarter pipe any color(s) you want. However, it’s best to choose an outdoor all-weather paint that doesn’t fade and flake. Paint and seal on a dry day when there’s no rain, fog, or other excess moisture on the horizon for at least 24 to 48 hours. Doing this gives your project plenty of time and the opportunity to dry completely.
- Building a backyard quarter pipe may seem like a daunting project, but with good information and some motivation, you’ll be riding your DIY quarter pipe in no time. It should take you a couple of hours, though you can double that if you have little to no building experience. Fortunately, this is a project almost anyone can do at home in an afternoon. Once you have the necessary tools and materials, it’s surprisingly easy.
Final Thoughts
Building a backyard quarter pipe makes a lot of sense when you want to improve your skateboarding skills, practice new tricks, and have fun.
Making your own equipment isn’t difficult if you know what you’re doing. Skip right past the guesswork and poorly designed, cobbled together, rickety, dangerous ramps that land people in the hospital when they fall apart.
Follow the directions above to build your own sturdy, reliable quarter pipe that you can use every day.

